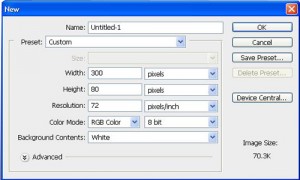
Step 1. Go to the file menu choose a new document.
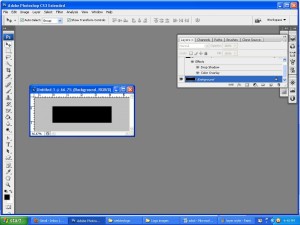
Step 2. Select bagkground layer fill background color solid black #000000.
Step 3. Go to tools and select ‘custom shape tool (U)’
Step 4. Go to set shape to create.
Step 5. Select home shape and drag it.

Step 6. Drag the home shape.
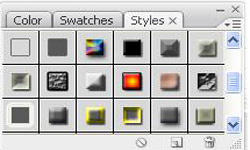
Step 7. Go to the window select style and use it.
Step 8. Now using the text tool type the word “Realstate” on the screen using white as the color. The font that I am using is ‘Bauhaus-Thin Wide’ and the size is 48pt.
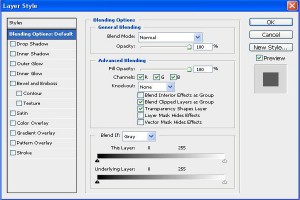
Step 9. Now open the Layer Style window by right clicking the layer and selecting Blending Options.
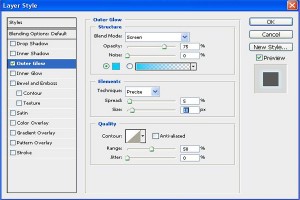
Step 10. Now choose an Outer Glow with the following settings in layer style.
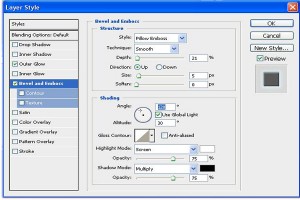
Step 11. And Now choose the Bevel and Emboss settings.
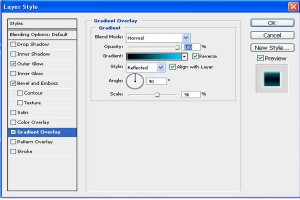
Step 12. Then apply this gradient overlay.
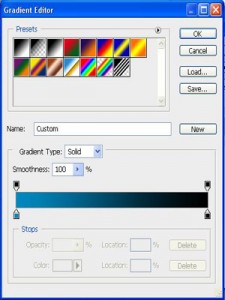
Step 13. Choose here are the color settings for the gradient.
Step 14. Now apply the settings and your image should look like this.
Step 15. Now we need to add another layer. With the shape Custom Shape tool select the fire shape, pictured below. This is a default shape in Photoshop CS3. and Use white as your fore color and draw a large section of fire over top of your text.
Step 16. Now set the layer blend mode to Overlay and reduce the Opacity to 60%.
Step 17. Now you are finished. Your final logo image should look like this.





1 Comment
Kaci Shirah
March 11, 2012 at 3:54 amHi there blog owner, thnxx for putting up this post. I found it wonderful. Certainly, Scarlett..