When you have registered a domain and , it time to map the domain with your web host. This step might not be required if you have purchased both domains and web hosting from same provider. But if providers for Domains and web hosts are different, you need to map the domain with host server.
What is domain mapping?
Whenever you type a domain in a web browser, it takes you to web host where the files essential to display the website are stored. To achieve this, we need to point the domain to web host using Domain Name Servers (DNS) provided by the web host. On the other hand, we need to intimate the webhost about the domain which has been pointed to it so that the host can relate it to your account and display the website accordingly. This whole process is called Domain mapping.
How to map a domain with web host?
When you buy hosting, the web host sends you a welcome email containing information about your server including the address of the files of your website. Following is the screenshot of mail I received from Hostgator when I purchased a hosting account with them. The body of mail could differ depending on the host you choose but that hardly matters. All we need here is the URL to login control panel and the name servers (highlighted below in Red).

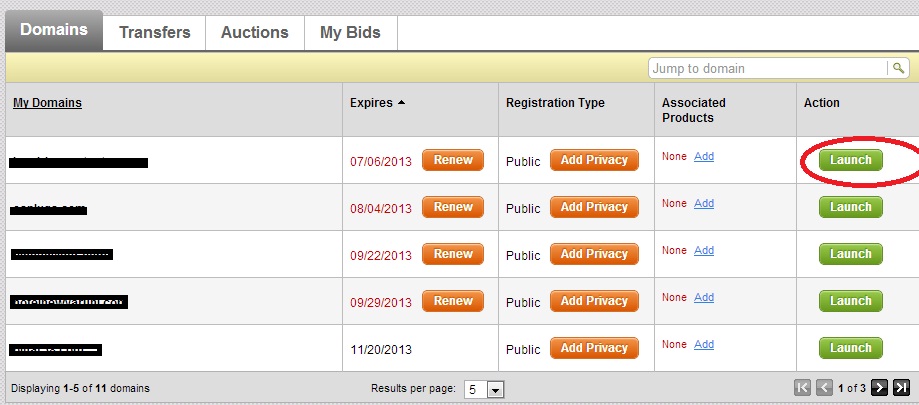
Now when you know you name server address (DNS), you need to provide them to the domain registrar. To do this, go to the website from where you purchased the domain and access the list of domains under your account. Something similar to the following screenshot will appear on the screen. Click on the ‘Launch’ button under the domain whose name servers you wish to specify.
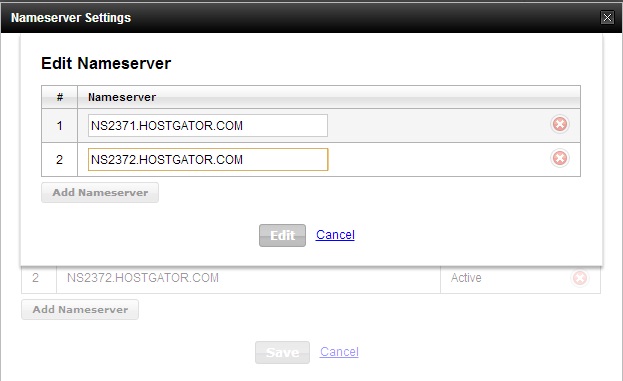
The following screenshot shows your domain settings where the ‘Manage’ link allows you to edit information. Clicking on ‘Manage’ next to the nameservers as highlighted in the next screenshot opens up a dialog box where you can specify the nameservers.

Having come so far, you would have ensured that the registrar knows where to look for when a given domain is accessed. Now, it is important for the server to know which files correspond to which domain.
If you are purchasing web hosting for the first time, your web host might have already asked you to provide the domain, in that case you can skip this step. In case, you already have an hosting account which allows using more than one domain in the same account, here’s how you can set up the second domain.
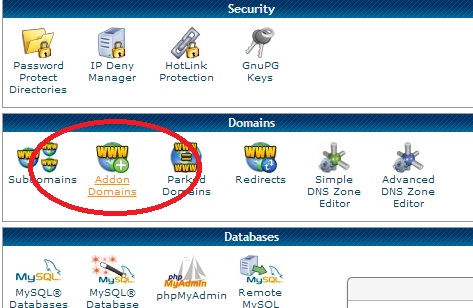
The email your web host also contains the address of something known as a cPanel. Put in that address in your address bar or click it from the mail itself. After logging in you will be greeted with a control panel. Visit the domain section and look for the icon called Add-on. Click on it.
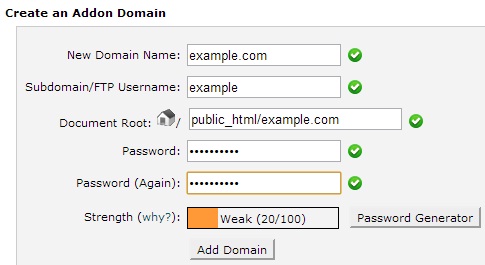
Clicking on it will open a dialog box somewhat similar to the following one where in you can specify your domain name. The document root in the picture specifies the home page of the website.
And that is how you go about mapping your domain.The host has a way to know the domains it is serving and the domain registrar has a way to know who and where the host is. You are required to do this only once unless you happen to change your web host, in which case you will have to update the changes accordingly.
As you may have noticed that most parts of the process is automated and all you need to do is to comprehend how it all fits together. So, there you go!