Creating a gallery is the best way to show several images at once. There are multiple ways to create a gallery in WordPress, which are –
- Create a gallery without using any plugin
- Create a gallery with a plugin.
We have published an in-depth tutorial about creating a gallery without using any plugin. Check that tutorial if you don’t want to use a plugin.
On the other hand, if you want advanced formatting, lightbox support, and superior control over the gallery, you have to use a plugin.
There are several WordPress plugins for creating galleries. Among these, I especially like the Gallery by Envira plugin. The plugin comes with a drag and drop gallery builder, complete lightbox support, and lots of other features.
Read on to know how to create a gallery with the Gallery by Envira plugin.
Creating a New Gallery
Once you install and activate the plugin, it will create a new menu item titled “Envira Gallery.” Go to Envira Gallery > Add New to create a new gallery. This will take you to a page like the following –

First of all, you can provide a title for the gallery. Then, there are three options to add images to your gallery –
- Dragging and dropping the files into the upload section,
- Using the “Select Files from Your Computer” button to upload new images or
- Using the “Select Files from Other Sources” button to use images from the media library.
Upload images by using your preferred method. The plugin will show a grid of the images you selected. Each image will have two options – Modify and Remove.
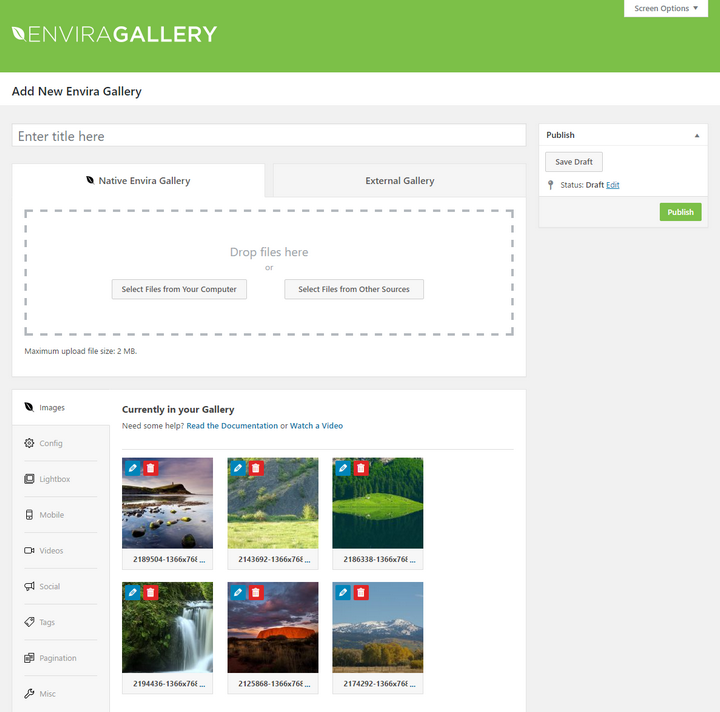
Click the Modify icon to open the metadata editing page for the image. You will find separate options to provide or update the title and alt text of the image. Clicking the remove icon will remove the image from the gallery. You can re-arrange the image positions by dragging and dropping each image into its desired position.
Configuring the Gallery Settings
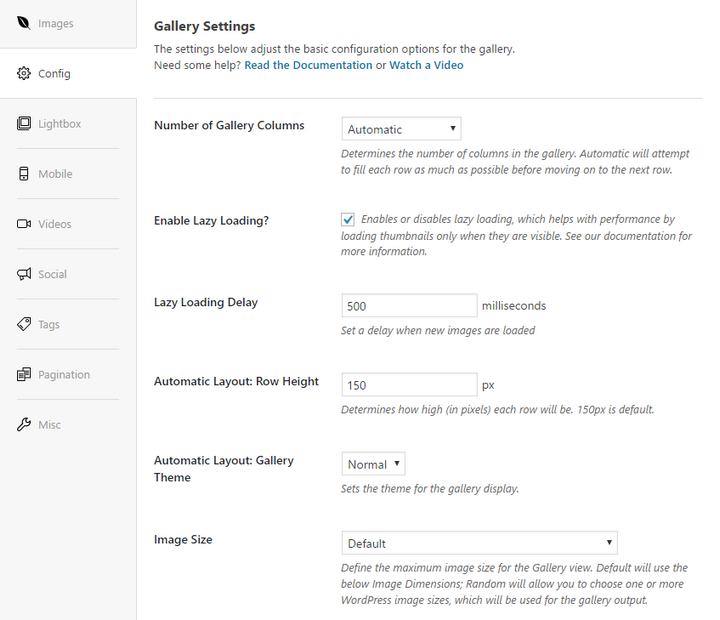
You will find the gallery settings in the “Config” section on the left-hand menu. The first option enables you to choose the number of gallery columns. You can allow the plugin to automatically define the number or choose the number of columns yourself.
The next two options will allow you to enable lazy loading and set the lazy loading delay in milliseconds. If you are using the automatic layout option, you will find options to choose the row height and theme for the gallery.
There are several options to choose the image size. Available options include the default size, thumbnail, medium, medium large, large, random, etc. If you are using the default size, you can provide the image dimensions in the next option.
The Lightbox Settings

The “Lightbox” section includes all the options related to the lightbox effect. The first checkbox allows you to enable or disable the gallery lightbox. You will find another option to choose the image size for the lightbox. The available options include default, thumbnail, medium, medium large, large, random, etc.
Caption position is the last option of this section. You can choose float, float(wrapped), inside, outside, or over as the caption position.
Other Settings
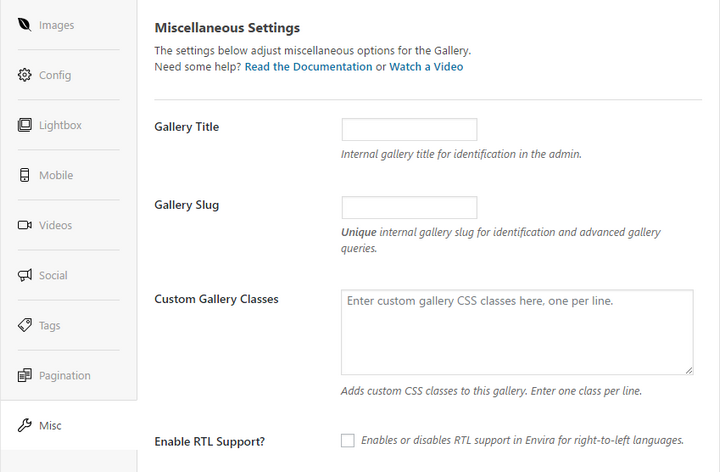
The miscellaneous gallery settings options are located in the “Misc” section. Here, you will find separate options to provide a gallery title, provide a custom slug and CSS class(es). If you want to use the gallery in RTL languages, check the “Enable RTL Support” box.
Displaying the Gallery
Once you have added the images, configured the various settings, you can publish the gallery by clicking the “Publish” button. At this point, you have created a gallery with the Gallery by Envira plugin. Now, you need to show it on your website.
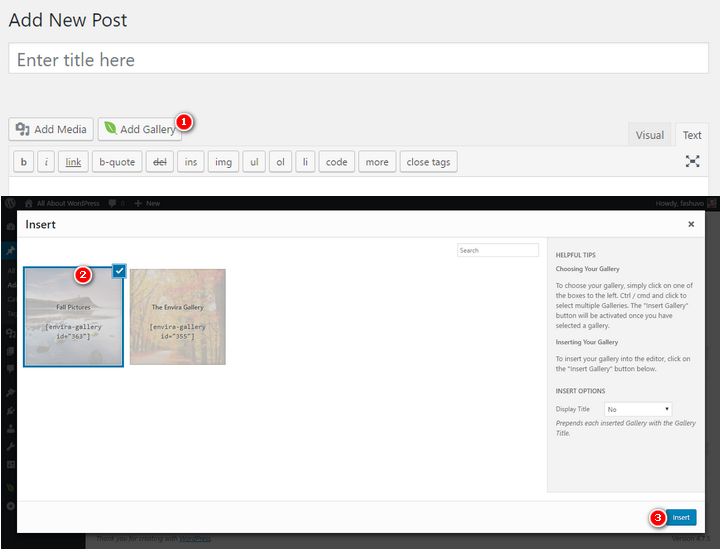
Gallery by Envira makes it very easy to display the gallery on your posts or pages. To do that, go to the post editor where you will notice a new button titled “Add Gallery.” Click that button to open a pop-up window containing all the galleries created by the plugin. Choose your gallery and click the “Insert” button. This will add the gallery to your post.
Using the Shortcode to Display the Gallery
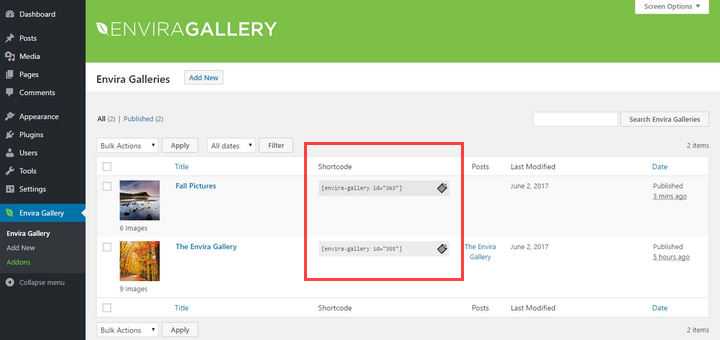
Gallery by Envira also creates a unique shortcode for each of your galleries. To get the shortcode, click on the Envira Gallery link on your dashboard. This will take you to a list of all the galleries created by the plugin along with the shortcodes. Copy the shortcode of your desired gallery.
You can use the shortcode to display the gallery in any post, page, or widget. To show the gallery in a post or page, go to the post editor and paste the shortcode into your desired position.
On the other hand, it is also possible to display the gallery on the sidebar or other widget-enabled location. To do that, go to Appearance > Widgets. Find out the text widget and drag it to your desired place.
Provide a title for the widget. Paste the gallery shortcode into the content section. Click the “Save” button. Now, reload your website and enjoy your brand new gallery on the sidebar.
Premium Features
There is a premium version of the Gallery by Envira plugin. The pro version comes with several professionally designed templates to make your galleries look more attractive. It also allows you to publish standalone galleries without requiring any post or page. The premium plugin will make all of your galleries fully responsive.
There are lots of add-ons available to add additional features like adding videos to your gallery, adding watermark to your images, providing social share options, adding pagination, tags, password protection, importing images from Instagram, Dropbox, NextGen, etc.
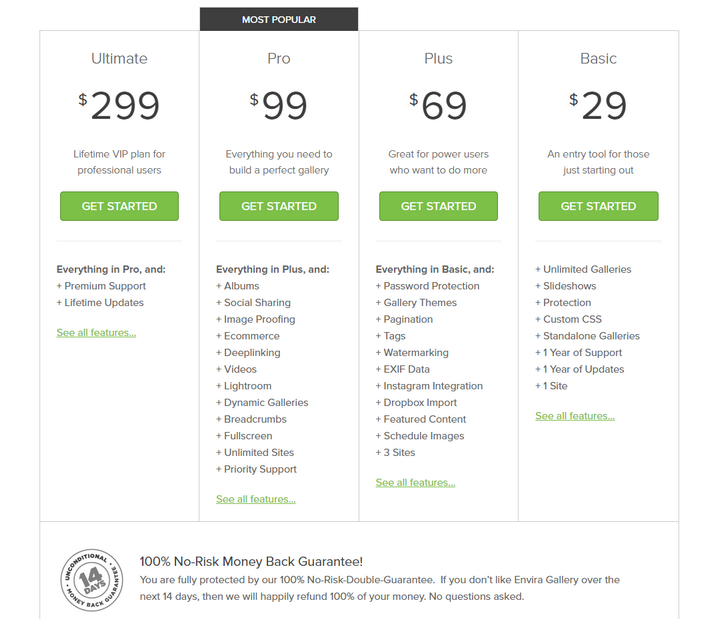
Gallery by Envira offers four pricing plans. The basic plan is priced at $29, which allows you to use the plugin in one website and provides access to the basic addons.
Final Words
Creating beautiful galleries becomes a lot easier when you use a professional plugin like Gallery by Envira. Now that you have read this tutorial, you know how to create a gallery with this plugin and also found out the attractive premium features.
So, what do you think about the Gallery by Envira plugin? Does it offer all the necessary features for creating a gallery? Let me know in the comments below.
1 Comment
Emily Brown(wordpress website development expert)
October 27, 2017 at 5:06 amThanks for the information. I will use it.